At the beginning of March I released Gradient Backgrounds Studio, app born from a simple need my girlfriend had to add a gradient on top of an image to make a better background. It was one of those ideas that hit you and no matter if it's 1 o'clock in the morning you have to code them.
Gradient Backgrounds Studio is a very simple app with a very simple implementation, but it gave me an excuse to play with some components of the framework I didn't know about.
CGGradientLayer
Guess what? The app is all about gradients. The first thing I had to learn was how to create and manipulate gradients.
When it comes down to graphic staff Quartz is the framework we need to look at, and it has exactly the class we're looking for: CAGradientLayer.
The CAGradientLayer class draws a color gradient over its background color, filling the shape of the layer (including rounded corners)
Creating the layer is simple:
CAGradientLayer *gradientLayer = [CAGradientLayer layer];
gradientLayer.backgroundColor = [UIColor clearColor].CGColor;

CGRect frame = CGRectMake(0, 0, 100, 100);

UIColor *startColor = [UIColor redColor];
UIColor *endColor = [UIColor orangeColor];

gradientLayer.frame = frame;
gradientLayer.colors = @[ (id)starColor.CGColor, (id)endColor.CGColor ];
There are cool things we can do, like having more colors and configuring how the gradient is rendered through its start and end point.
CAGradientLayer *gradientLayer = [CAGradientLayer layer];
gradientLayer.backgroundColor = [UIColor clearColor].CGColor;

CGRect frame = CGRectMake(20, 20, 200, 200);

UIColor *startColor = [UIColor blueColor];
UIColor *middleColor = [UIColor whiteColor];
UIColor *endColor = [UIColor purpleColor];

gradientLayer.frame = frame;
gradientLayer.colors = @[ (id)startColor.CGColor, (id)middleColor.CGColor, (id)endColor.CGColor ];

gradientLayer.endPoint = CGPointMake(1.0, 0.5);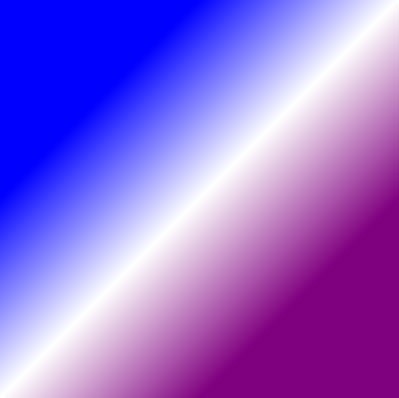
UIImage from a gradient
Gradient Backgrounds Studio generates an image out of the one you pick and the gradient you configure. So the next thing I had to do was merging those images.
As with most things, there are multiple ways to achieve that result. The one I choose was to make an image out of the gradient layer, and then merge the two images into one.
The code to do it may look mysterious, but I added comments to explain it.
CGRect frame = CGRectMake(20, 20, 200, 200);
UIColor *startColor = [UIColor orangeColor];
UIColor *endColor = [UIColor purpleColor];

// Create a new bitmap-based image context, and make it current.
// This way we'll be able to draw stuff in the context and get an UIImage back from it.
//
CGSize size = frame.size;
UIGraphicsBeginImageContextWithOptions(size, NO, 0);

CGColorSpaceRef colorspace = CGColorSpaceCreateDeviceRGB();

// Define the "locations" of the gradient, the points where the color(s) transformation starts and ends
//
size_t gradientNumberOfLocations = 2;
CGFloat gradientLocations[2] = { 0.0, 1.0 };

// Get the color components out of startColor and endColor
//
// This is all just because I'm lazy and don't want to write the numbers myself.
//
CGFloat r0 = 0, g0 = 0, b0 = 0, a0 = 0;
CGFloat r1 = 0, g1 = 0, b1 = 0, a1 = 0;
[startColor getRed:&r0 green:&g0 blue:&b0 alpha:&a0];
[endColor getRed:&r1 green:&g1 blue:&b1 alpha:&a1];

CGFloat gradientComponents[8] = {
    r0, g0, b0, a0,
    r1, g1, b1, a1,
};

// Build a CGGradientRef structure with the values just gathered
//
CGGradientRef gradient = CGGradientCreateWithColorComponents(colorspace, gradientComponents, gradientLocations, gradientNumberOfLocations);

// Draw the gradient in the current context
//
CGContextRef context = UIGraphicsGetCurrentContext();
CGContextDrawLinearGradient(context, gradient, CGPointMake(0, 0), CGPointMake(0, size.height), 0);

// Get an image from the content of the curret context
//
UIImage *image = UIGraphicsGetImageFromCurrentImageContext();

// Release stuff and clean the context
//
CGGradientRelease(gradient);
CGColorSpaceRelease(colorspace);
UIGraphicsEndImageContext();
If you have been reading other articles from my blog you know by now I'm not clever, the credits for this code goes to this question on SO.
UIImage merging images
Now that we have the image with the gradient we can merge it with the background image. The code to do that is simpler than the one above, but based on the same principle; create a context, draw in it, and get an UIImage from it with what's drawn in it.
UIImage *image = ...
UIImage *gradientImage = ...
CGRect size = ...

UIGraphicsBeginImageContext(size);

CGRect imageRect = CGRectMake(0.0, 0.0, size.width, size.height);
[image drawInRect:imageRect];
[gradient drawInRect:imageRect];
UIImage *combinedImage = UIGraphicsGetImageFromCurrentImageContext();

UIGraphicsEndImageContext();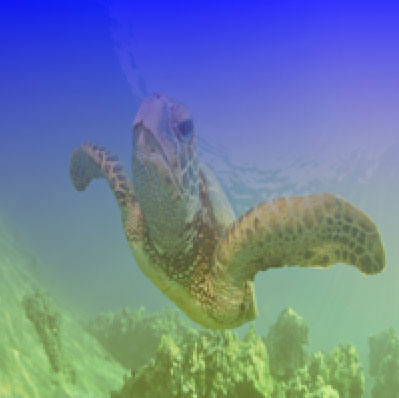
Note that the image is deformed, this is the original, the reason is that it's drawn in a rect that has a different ratio.
Blurring: UIToolbar does the job
The buttons of Gradient Backgrounds Studio are blurred because... iOS 7.
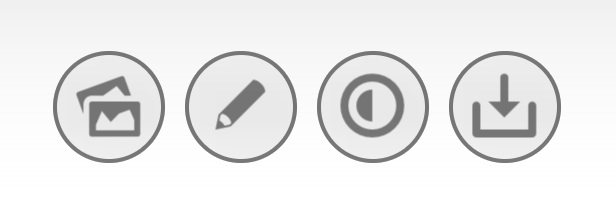
When I started reading about how to blur stuff I almost laughed at people suggesting to use UIToolbar, and looked into solutions like FXBlurView but the performance on live blurring were horrible. UIToolbar won it in the end.
A funny thing I bumped into when making the buttons rounded is that if I used exactly half of the frame side to set the corner radius, as you would normally do, the view disappeared! The solution I found to that was to set the corner radius to almost half the frame side, where almost = 0.999.
CGRect frame = ...

UIToolbar *blurredView = [[UIToolbar alloc] initWithFrame:frame];

// To enable proper blurring
//
blurredView.barStyle = UIBarStyleDefault;
blurredView.translucent = YES;

blurredView.clipsToBounds = YES;
// this makes the toolbar invisible! o.O
blurredView.layer.cornerRadius = frame.size.width / 2;
// this works!
blurredView.layer.cornerRadius = frame.size.width / 2 * 0.999;
One other important thing is that the toolbar blurs the background of it's superview, keep this in mind in case you have overlapping view.
Justify
The final thing I'd like to share is how to justify the text in a UILabel. Despite the fact that the textAlignement property accepts NSTextAlignmentJustified as an option I wasn't able to make my multiline label justify just like that.
I was finally able to achieve the result by using NSAttributedString and a NSMutableParagraphStyle.
NSString *message = ...

NSMutableParagraphStyle *justifiedParagraph = [[NSMutableParagraphStyle alloc] init];
justifiedParagraph.alignment = NSTextAlignmentJustified;

NSDictionary *attributes = @{ NSParagraphStyleAttributeName: justifiedParagraph, NSBaselineOffsetAttributeName: @0 };

NSAttributedString *justifiedMessage = [[NSAttributedString alloc] initWithString:message attributes:attributes];
Market-wise Gradient Backgrounds Studio is a failure, no more that an handful of downloads a day. But it was fun to make, and gave me a chance to learn new things, try out new designs patterns, and experiment. At the end of the day this is what matters, being able to always learn something new, and having fun!
If you have better solutions for the problems I faced I'd really like to hear them please tweet me @mokagio
Enjoy your next project!